Working as a graphic designer you will eventually come across a project where you are limited to a certain number of inks you can print with. Design companies that work mostly with print pieces know this struggle and how it can make you feel a bit limited. But fortunately for you and for your clients, you can mix spot colors in Indesign in order to give you a larger palette of colors to achieve the depth you want to achieve.
To mix inks in Indesign requires that you have one or more spot colors in your swatches panel. Spot colors are Pantone swatches and can be added by clicking swatch options in the Panel menu and changing the Color Mode to Pantone.
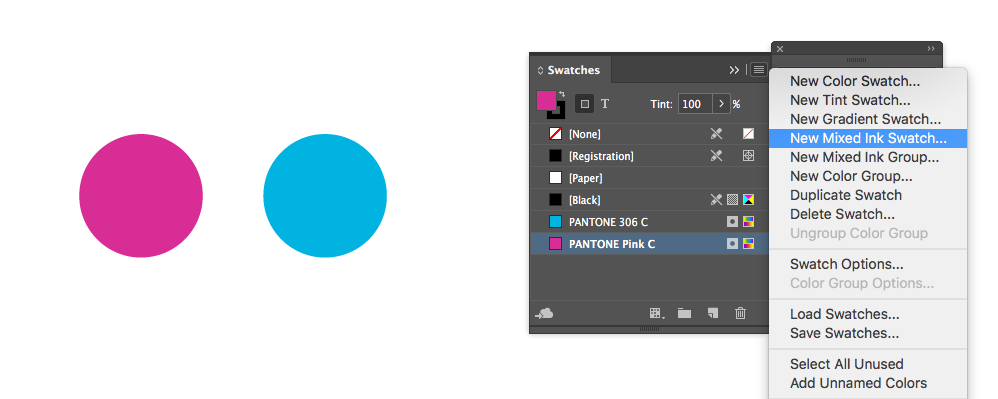
To start mixing new colors, first go to your Swatches palette, that contains at least one spot color. Next, go and open the Panel menu. Here you can select the New Mixed Ink Swatch, as shown in the screenshot below:
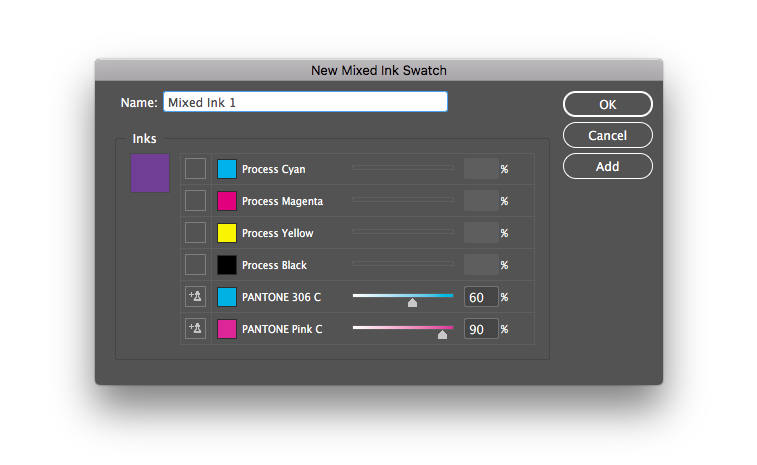
From this menu you can select which inks you want to mix and specify what percentage of each color you want in the mix. A preview of the color you’re creating will be in the top left of the panel so you can see what the mix will look like. Don’t forget to name your swatch before you click Ok to save it to your swatches. If you want to make more than one mixed ink swatch, click Add instead of Ok to add the current mix to your swatches and continue mixing inks in the open panel.
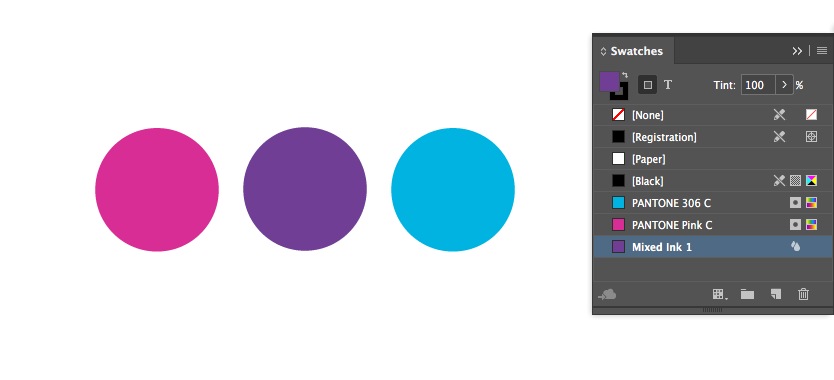
The new mixed ink will appear in your swatches palette. It can also be recognized as a mixed ink by the two-droplet icon on the right, as you can see in the screenshot below.
Now that you know how to mix inks in Indesign, you can design beautiful publications, using the colors you want.