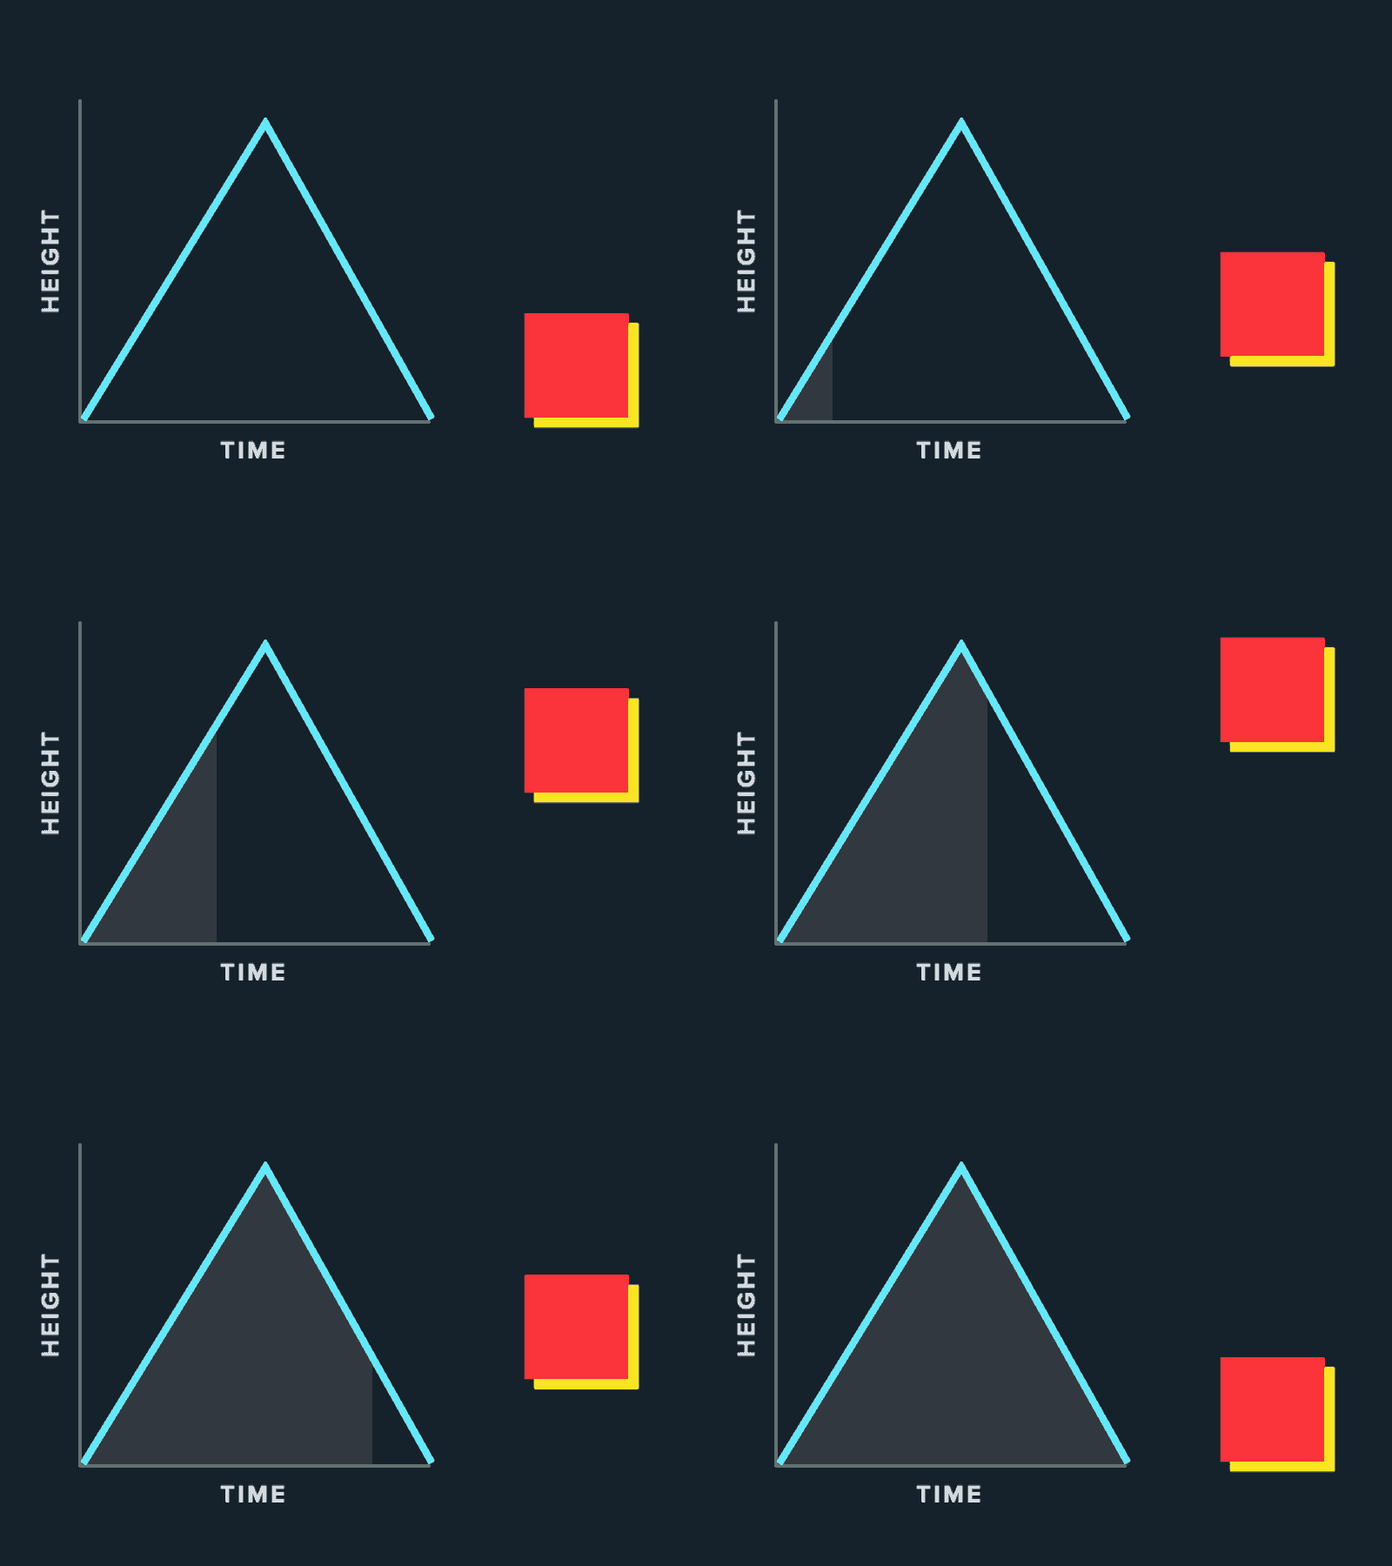
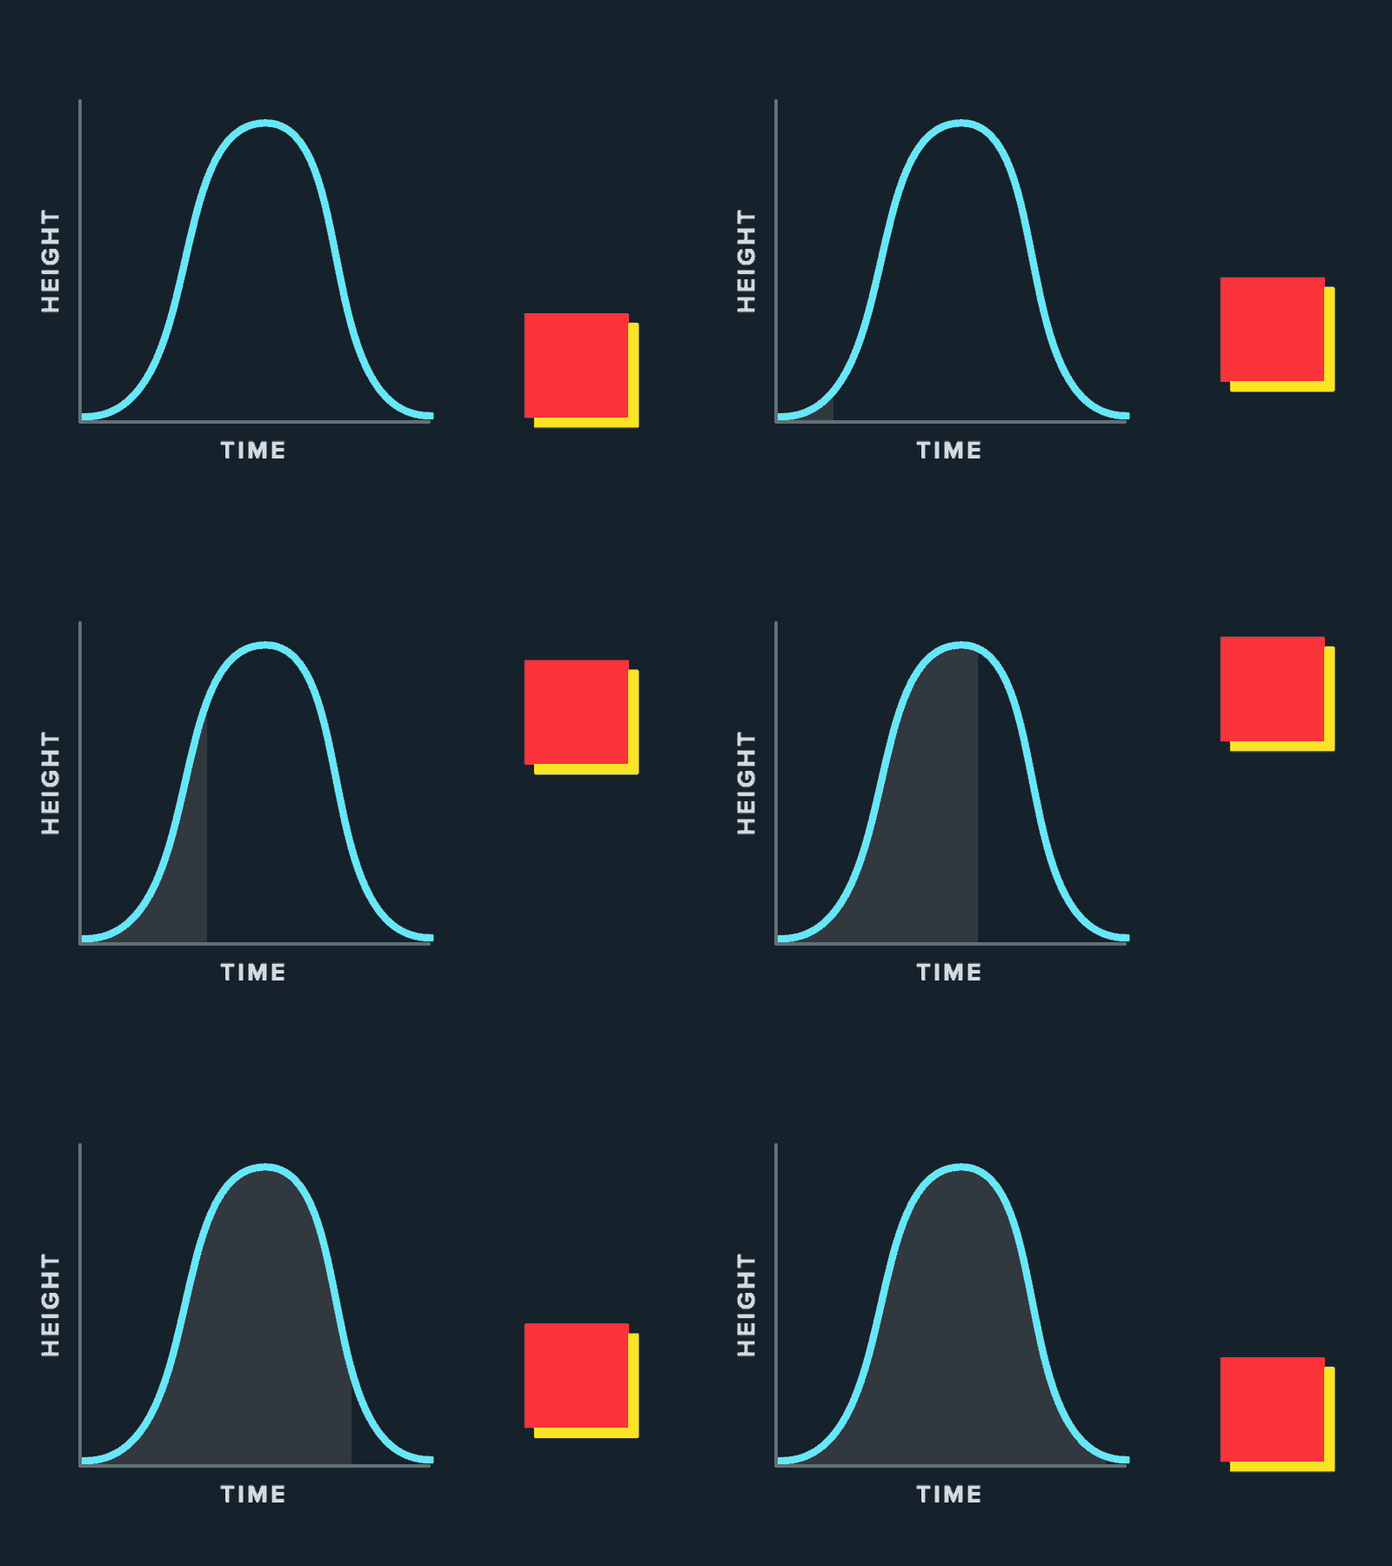
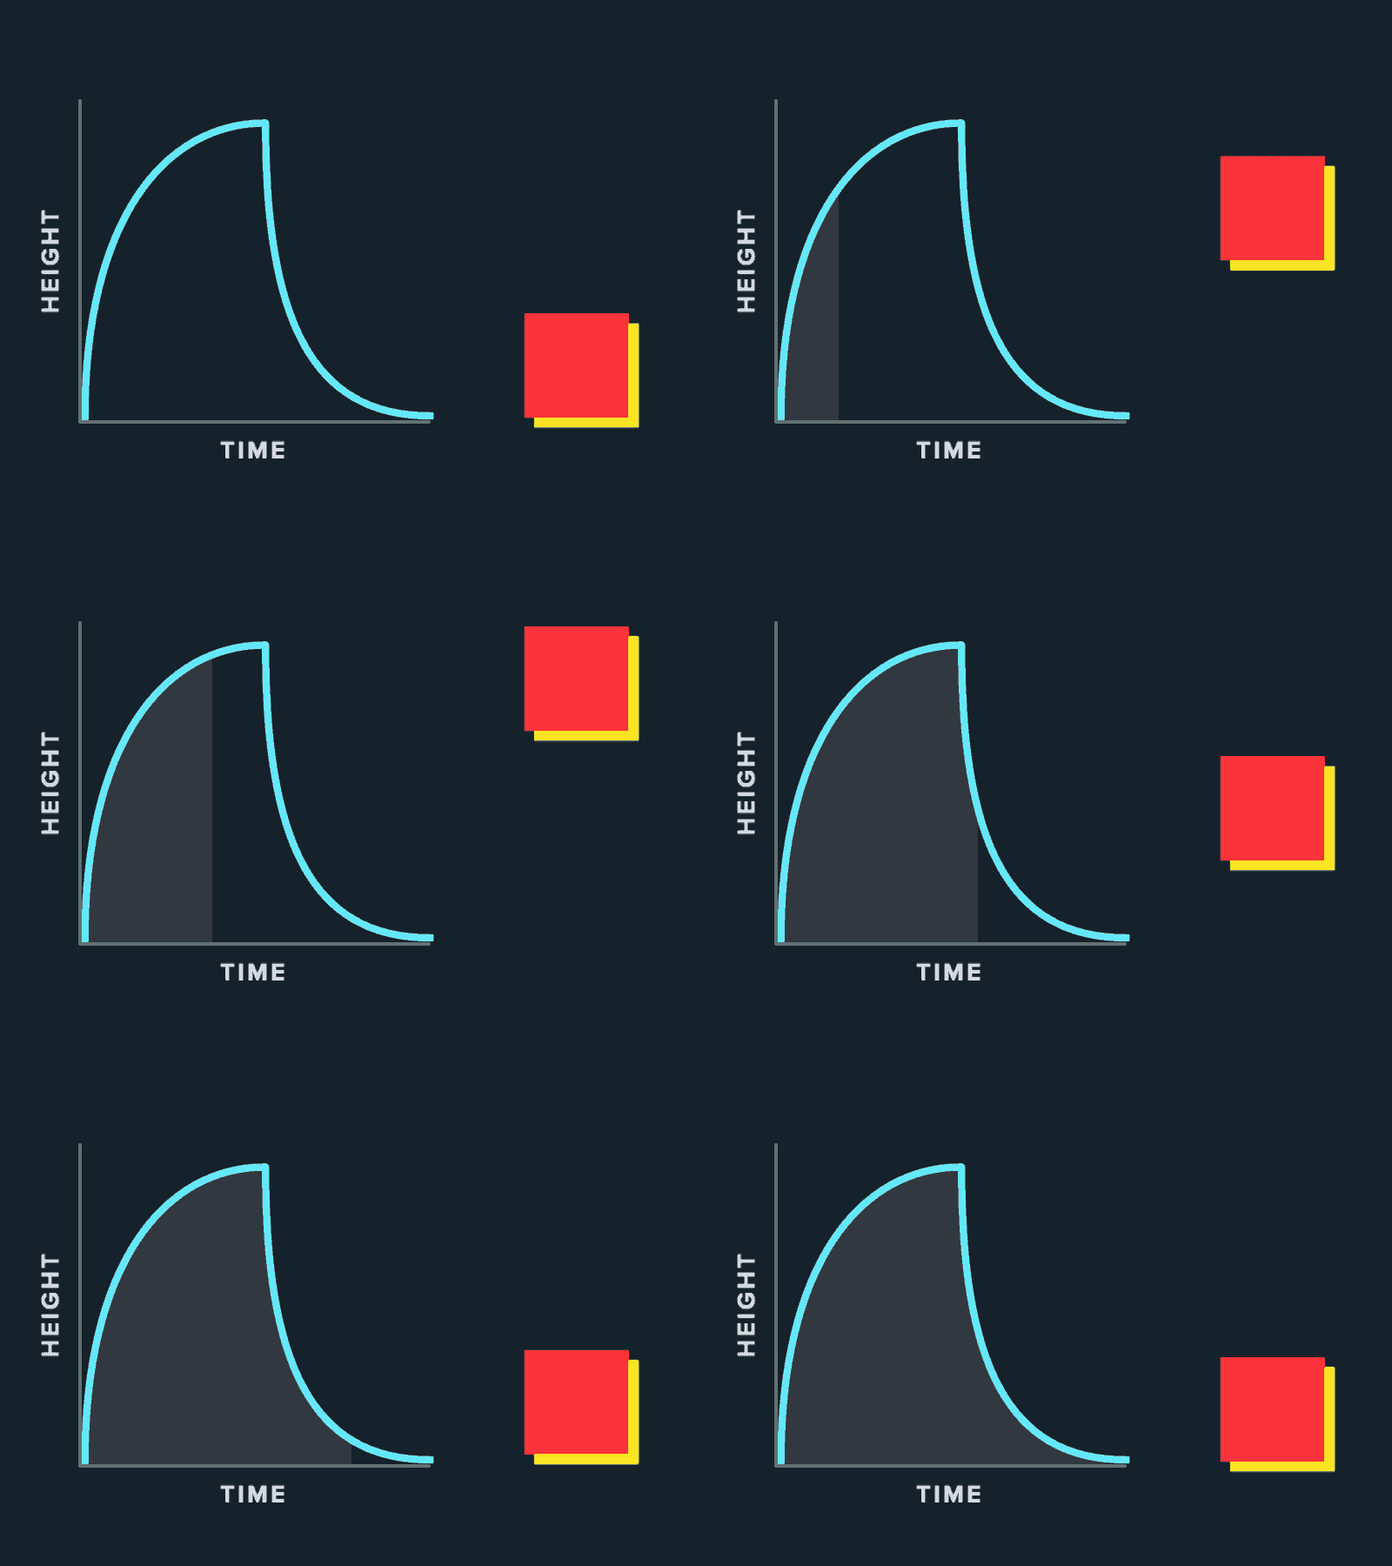
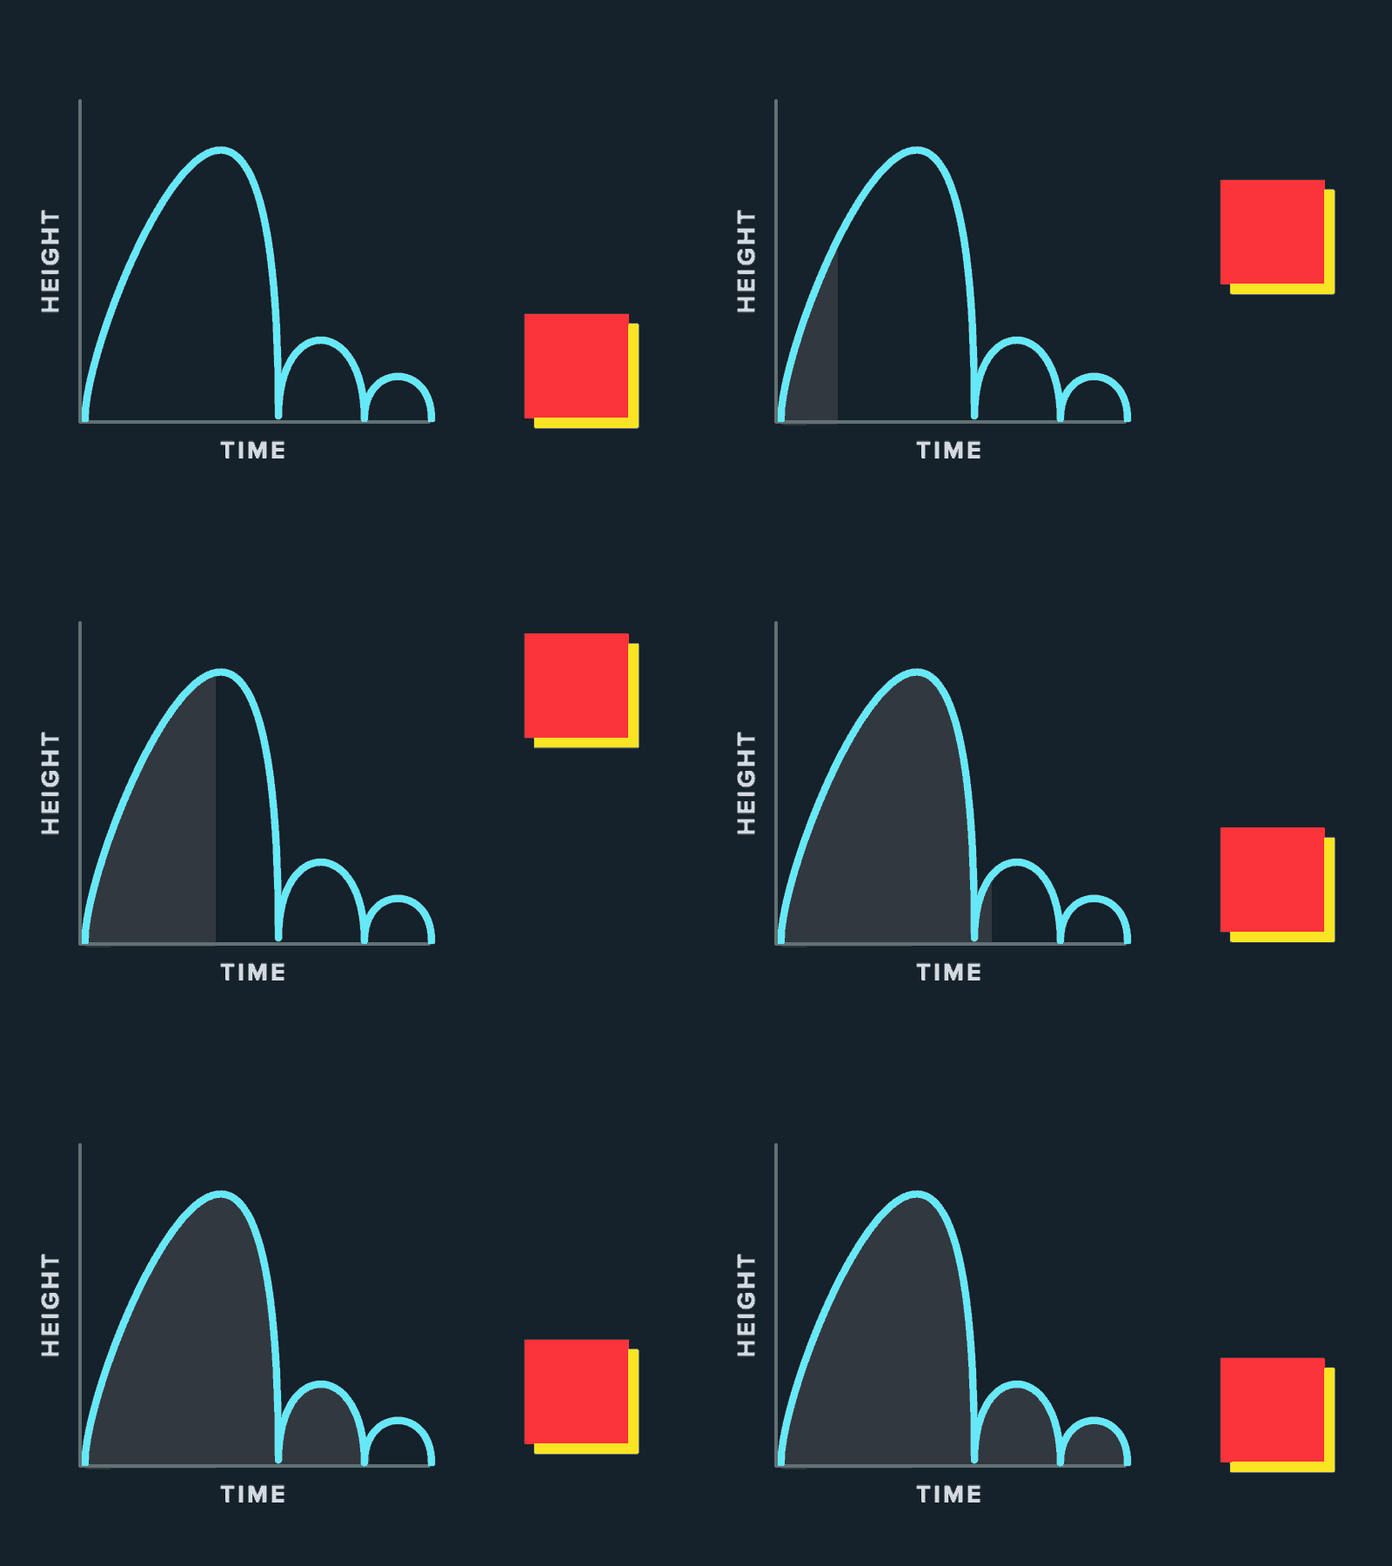
Creating a motion graphic that conveys the message and voice of its purpose can all come down to the subtleties of its elements. Even when all your animation’s colors, typefaces, and shapes are in order, there’s still another area that can turn satisfactory into superb: keyframes.
What is a keyframe?

Keyframes are anchor points for movements in motion graphics. You tell the software where a shape should be at the beginning and end, and it animates all the steps in between by itself. Most motion graphics solely use keyframes to modify and animate an object’s speed, size, rotation, position, and many more.
Whichever software you’re using to create motion graphics, there’s a good chance you have the ability to edit keyframes, it might just be hidden until you want it. As an industry standard, Adobe After Effects is the most common choice for animations of nearly any complexity.
How do keyframes work?
Let’s say you want to move a shape across the screen in your motion graphic. Rather than using a preset that might not suit exactly with your vision, or thinking you need to move it manually for each frame, you can set keyframes for it. In the beginning, the shape is in the bottom left. In the end, its in the top right. Sounds easy, and with keyframes it can be!If you move to the starting point in your timeline and set a keyframe of the shape in the bottom left, you’re telling the software “make sure this shape is here at this time.” Repeat with the end of the timeline in a new position and just like that you’ve got motion.
Playing it back

Something you may have noticed with your animation is how looks while it’s moving along the path. Most likely, the shape is moving from one position to the other without any change in speed. Just as you’d expect, this is fully editable. If you take a look at the graph editor of your keyframes, you get to see a visual representation of what’s causing this motion. Horizontally, you have the time of your video. Vertically, you have the values of the motion.
Adding character

As mentioned, the subtleties in the movements can be what makes or breaks a motion graphic. Just like you would with a path in Illustrator, you can add curves and complexity to this keyframes to change how the motion is interpreted.
In many cases, just curving the keyframe to ‘ease in’ and ‘ease out’ can add quite a bit of freshness to it.
Looking at the example, you can see the square moves with much more fluidity and realism. This type of keyframe can also be called an ‘Easy Ease’ depending on the software you’re in. But it doesn’t end there! Once you start getting the hang of adding eases to your motion, experimenting with combining different curves can change the attitude of the object being animated.

Only easing out can add a sense of spring-loaded movement—the object jumps into movement quick and slows down once it completes per motion.
Getting the hang of it

You can never play around too much with keyframes, try to mimic motion you see in real life: a ball bouncing on the ground, a pen starting to roll off a table, any movements can be recreated. Remember, keyframes can apply to so much more than the position of an object. When you make your next motion graphic, you can match a style of animation to the style of the object. Something more playful and lightweight might get an extra bounce to it, or something more structured and official might get a more subtle ease. The choice is yours!


