Have you ever wondered what else you should be doing besides lounging and binge-watching TV shows during a three-day weekend? For me, the answer is clear. I borrowed the iPad from work to explore all the hidden gems and wonders of Adobe Illustrator Draw.
Working in a design studio in Boston and being a long-time Adobe user, I was excited and intrigued by this drawing app. I first heard about Adobe Illustrator Draw a few years ago, but never got a chance to find any use for it. Over time, Adobe has done a lot of updates to this little app and it has evolved quite smashingly since its debut days.
The First Impression
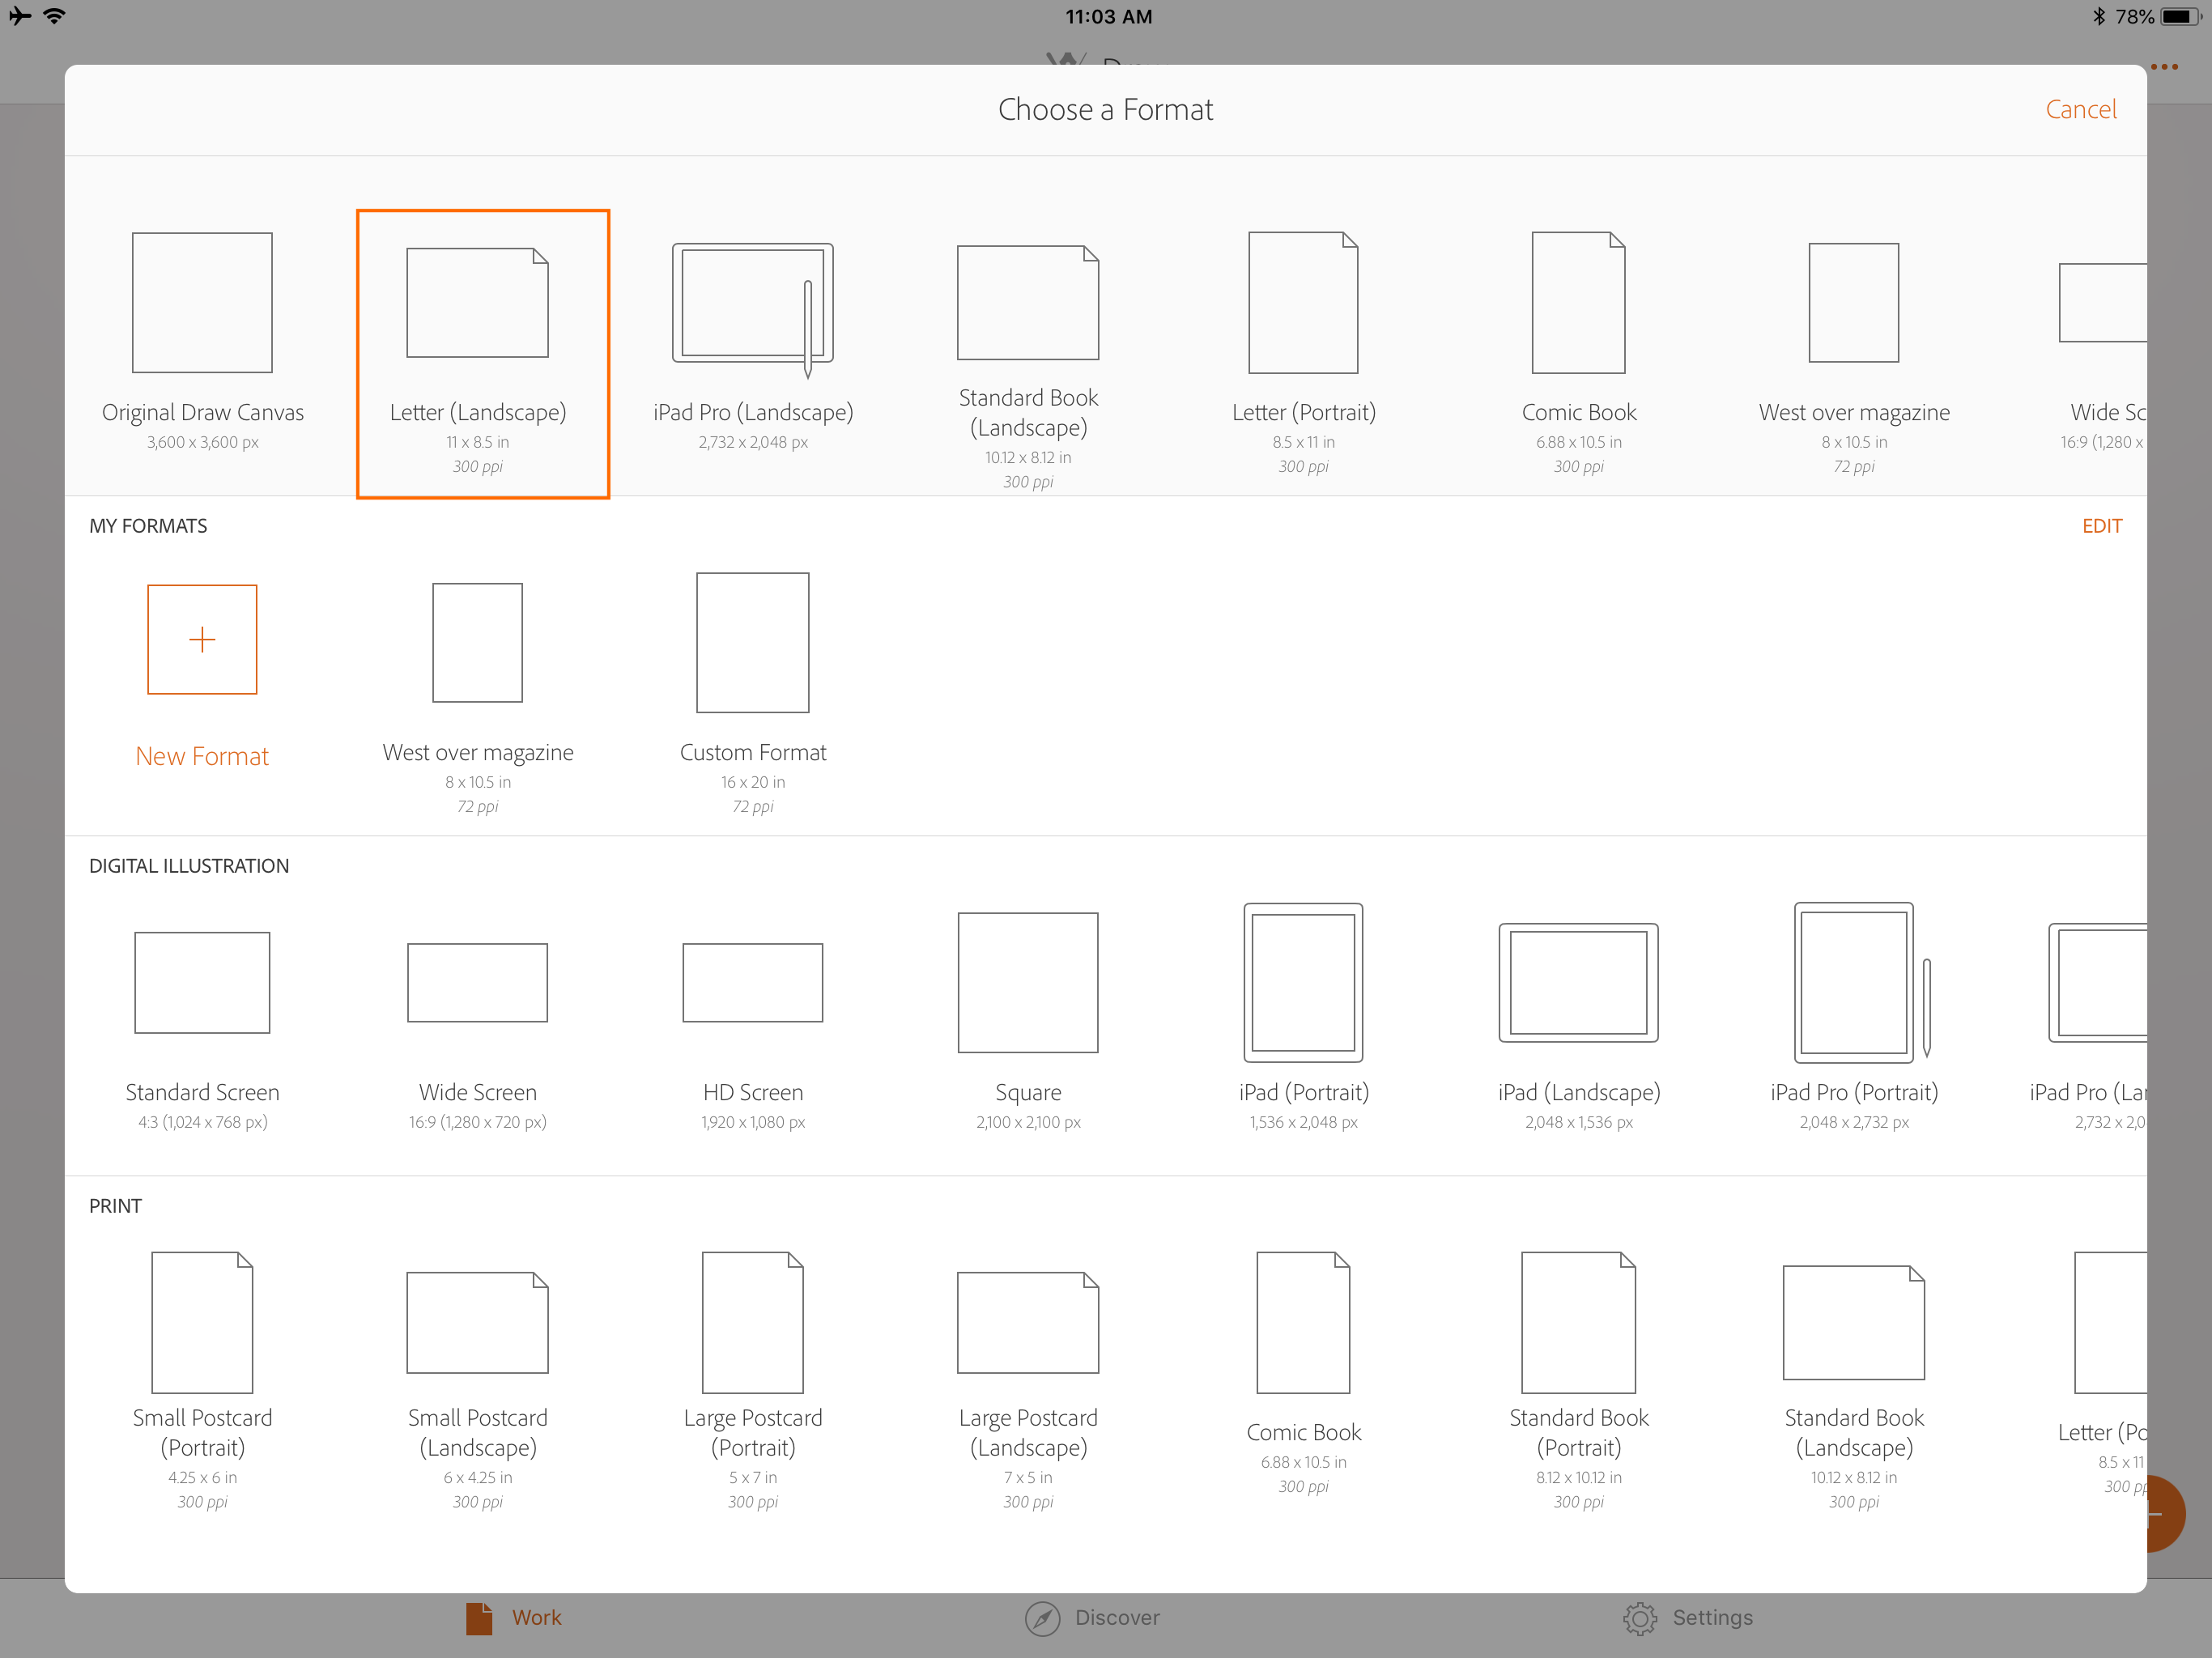
When I first opened Adobe Illustrator Draw (AID), I was impressed with its simple and clean interface. The app greets you with a variety of default artboard sizes to choose from. This is a very generous and thoughtful thing an app can do. My favorite artboard size to draw with is the standard landscape letter. It fits the most natural with the iPad screen.
After choosing your artboard size, you now move to where the real magic happens: the drawing board. You are equipped with a set of brushes panel along with a layer panel, where you can organize your drawing, adjust blend mode and opacity, etc.
Favorite Features
My first favorite feature has to be the pressure sensitivity setting. It makes drawing digitally feel really natural and smooth, since the size of the stroke changes according to your pressure.
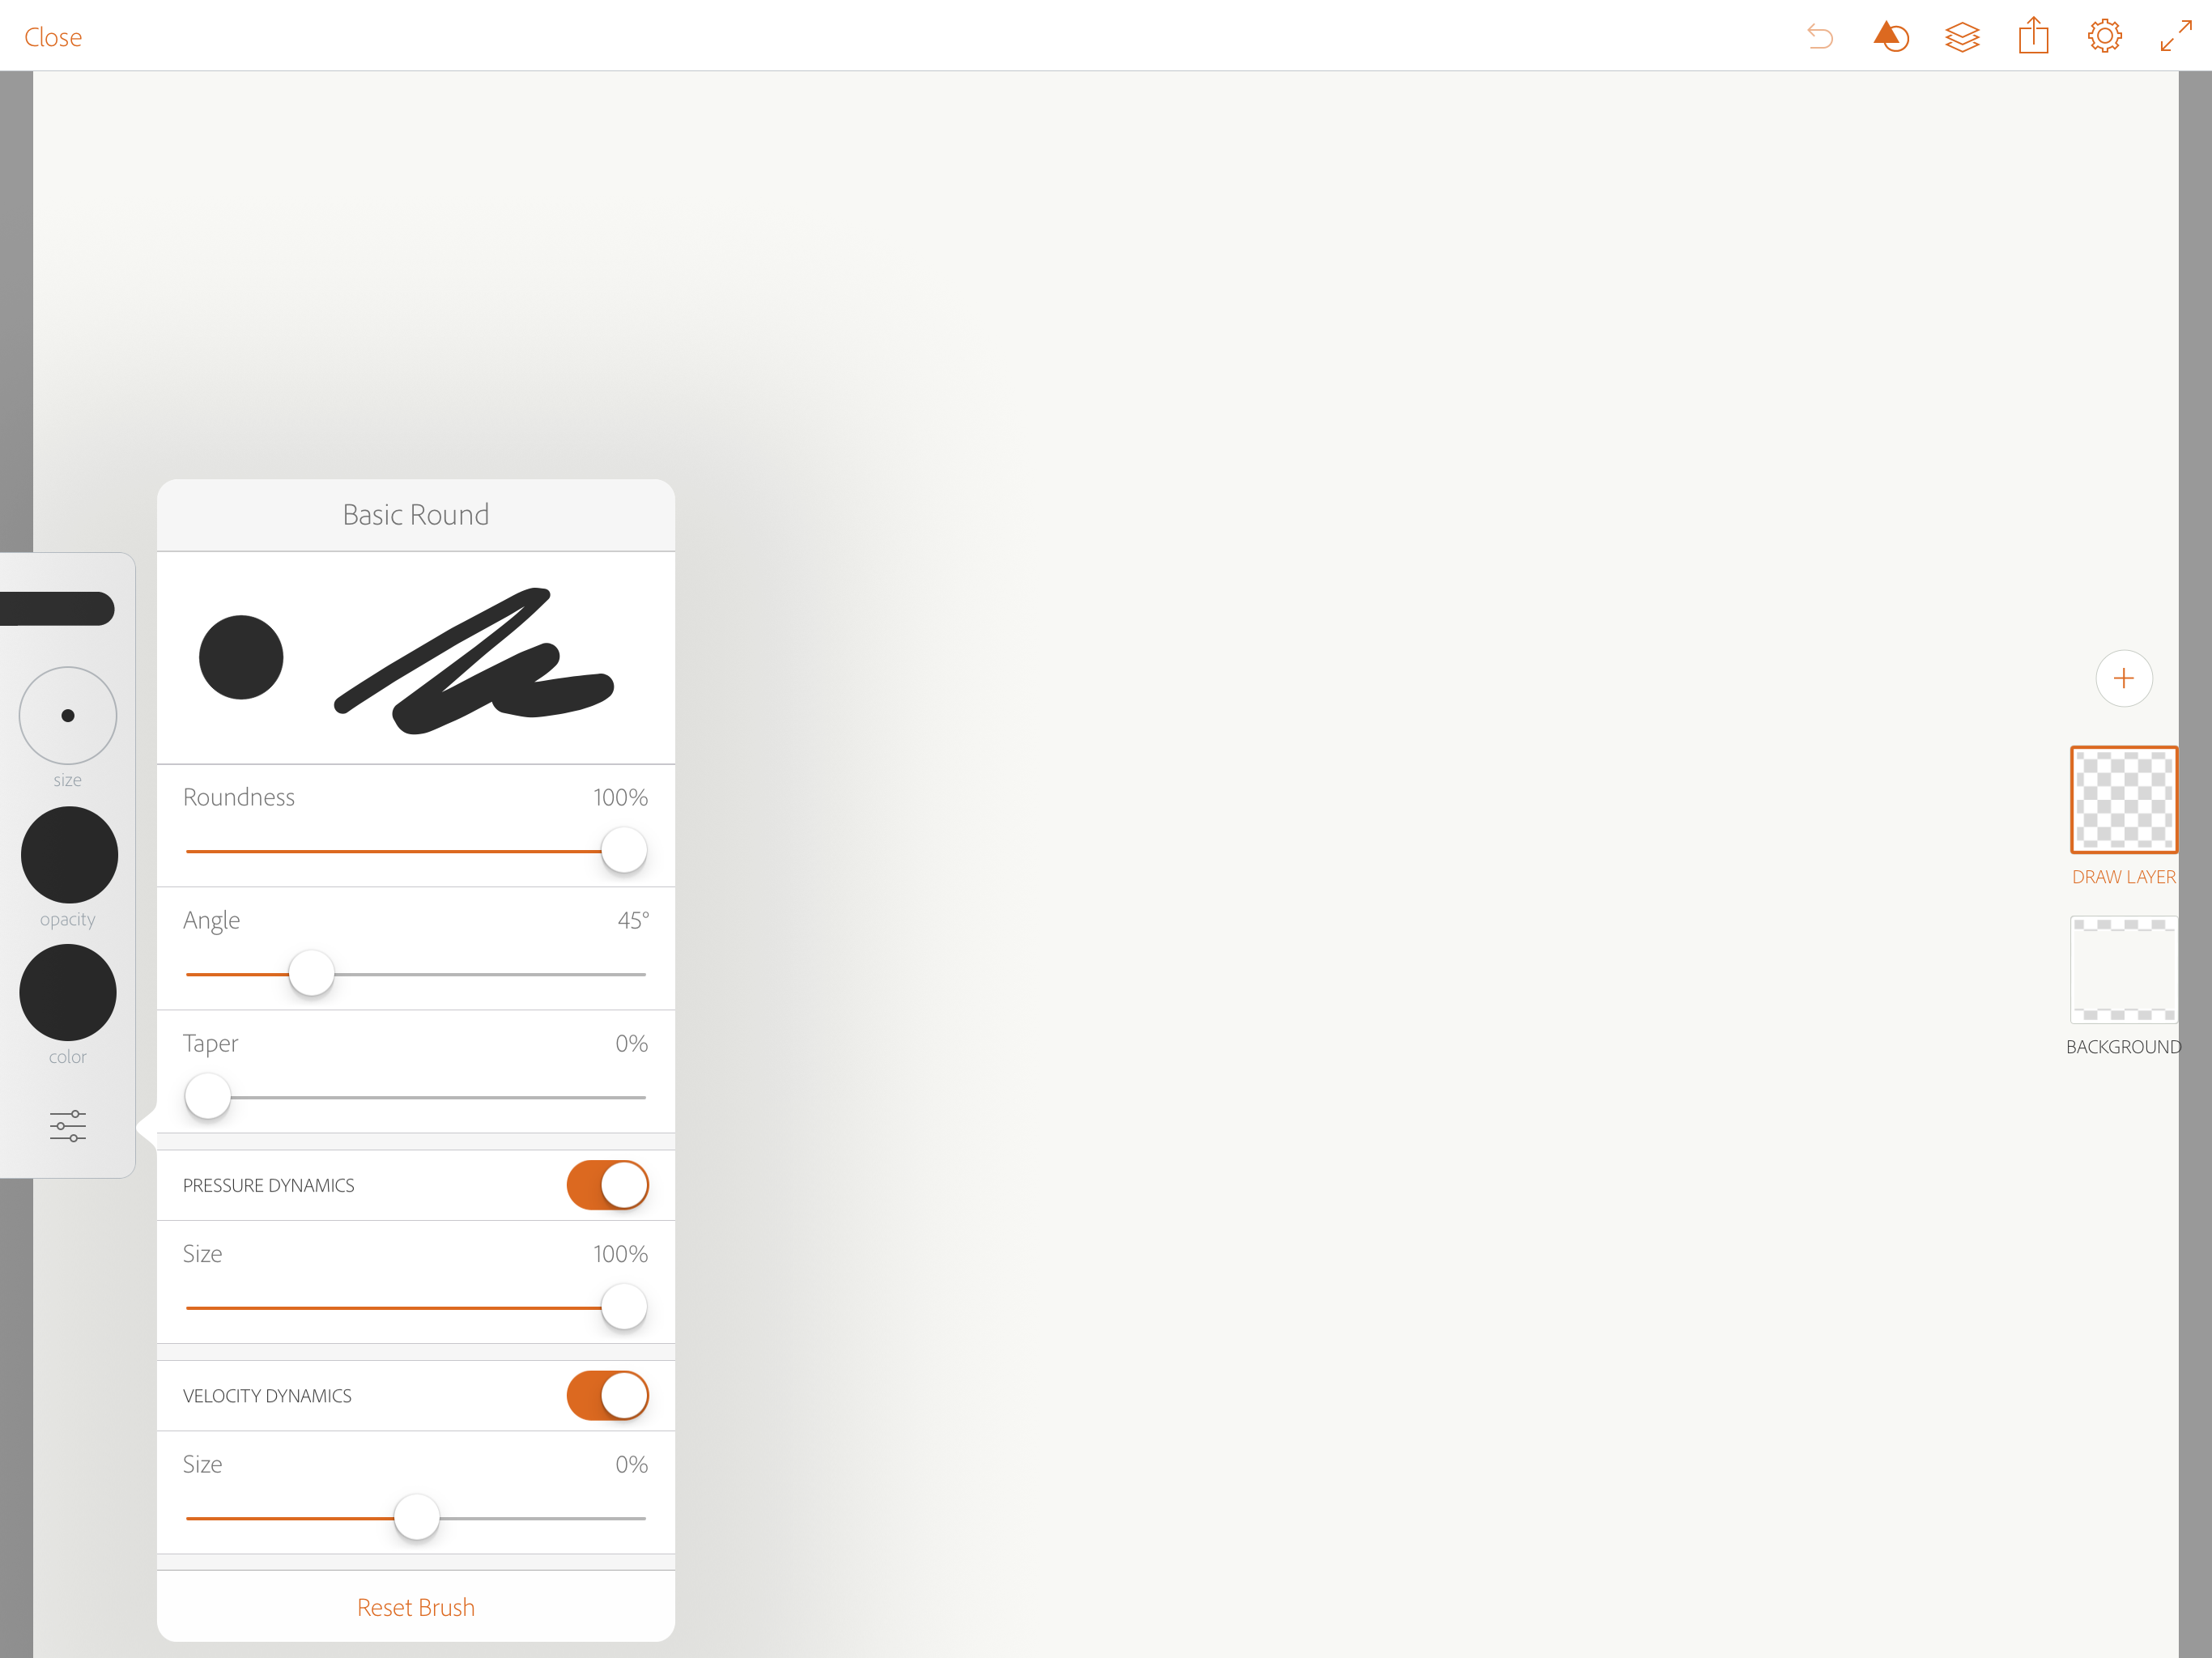
There are 5 different types of brushes you can choose from round, taper, flat, chisel, terminal, along with an eraser brush. Each brush has four different settings that you can customize: size, opacity, color, and basic setting, where you can adjust anything from the roundness of your brush to how much pressure sensitivity that works most natural for you. My personal preference is 100% pressure dynamics with 8.0 brush size and 45-degree angle.

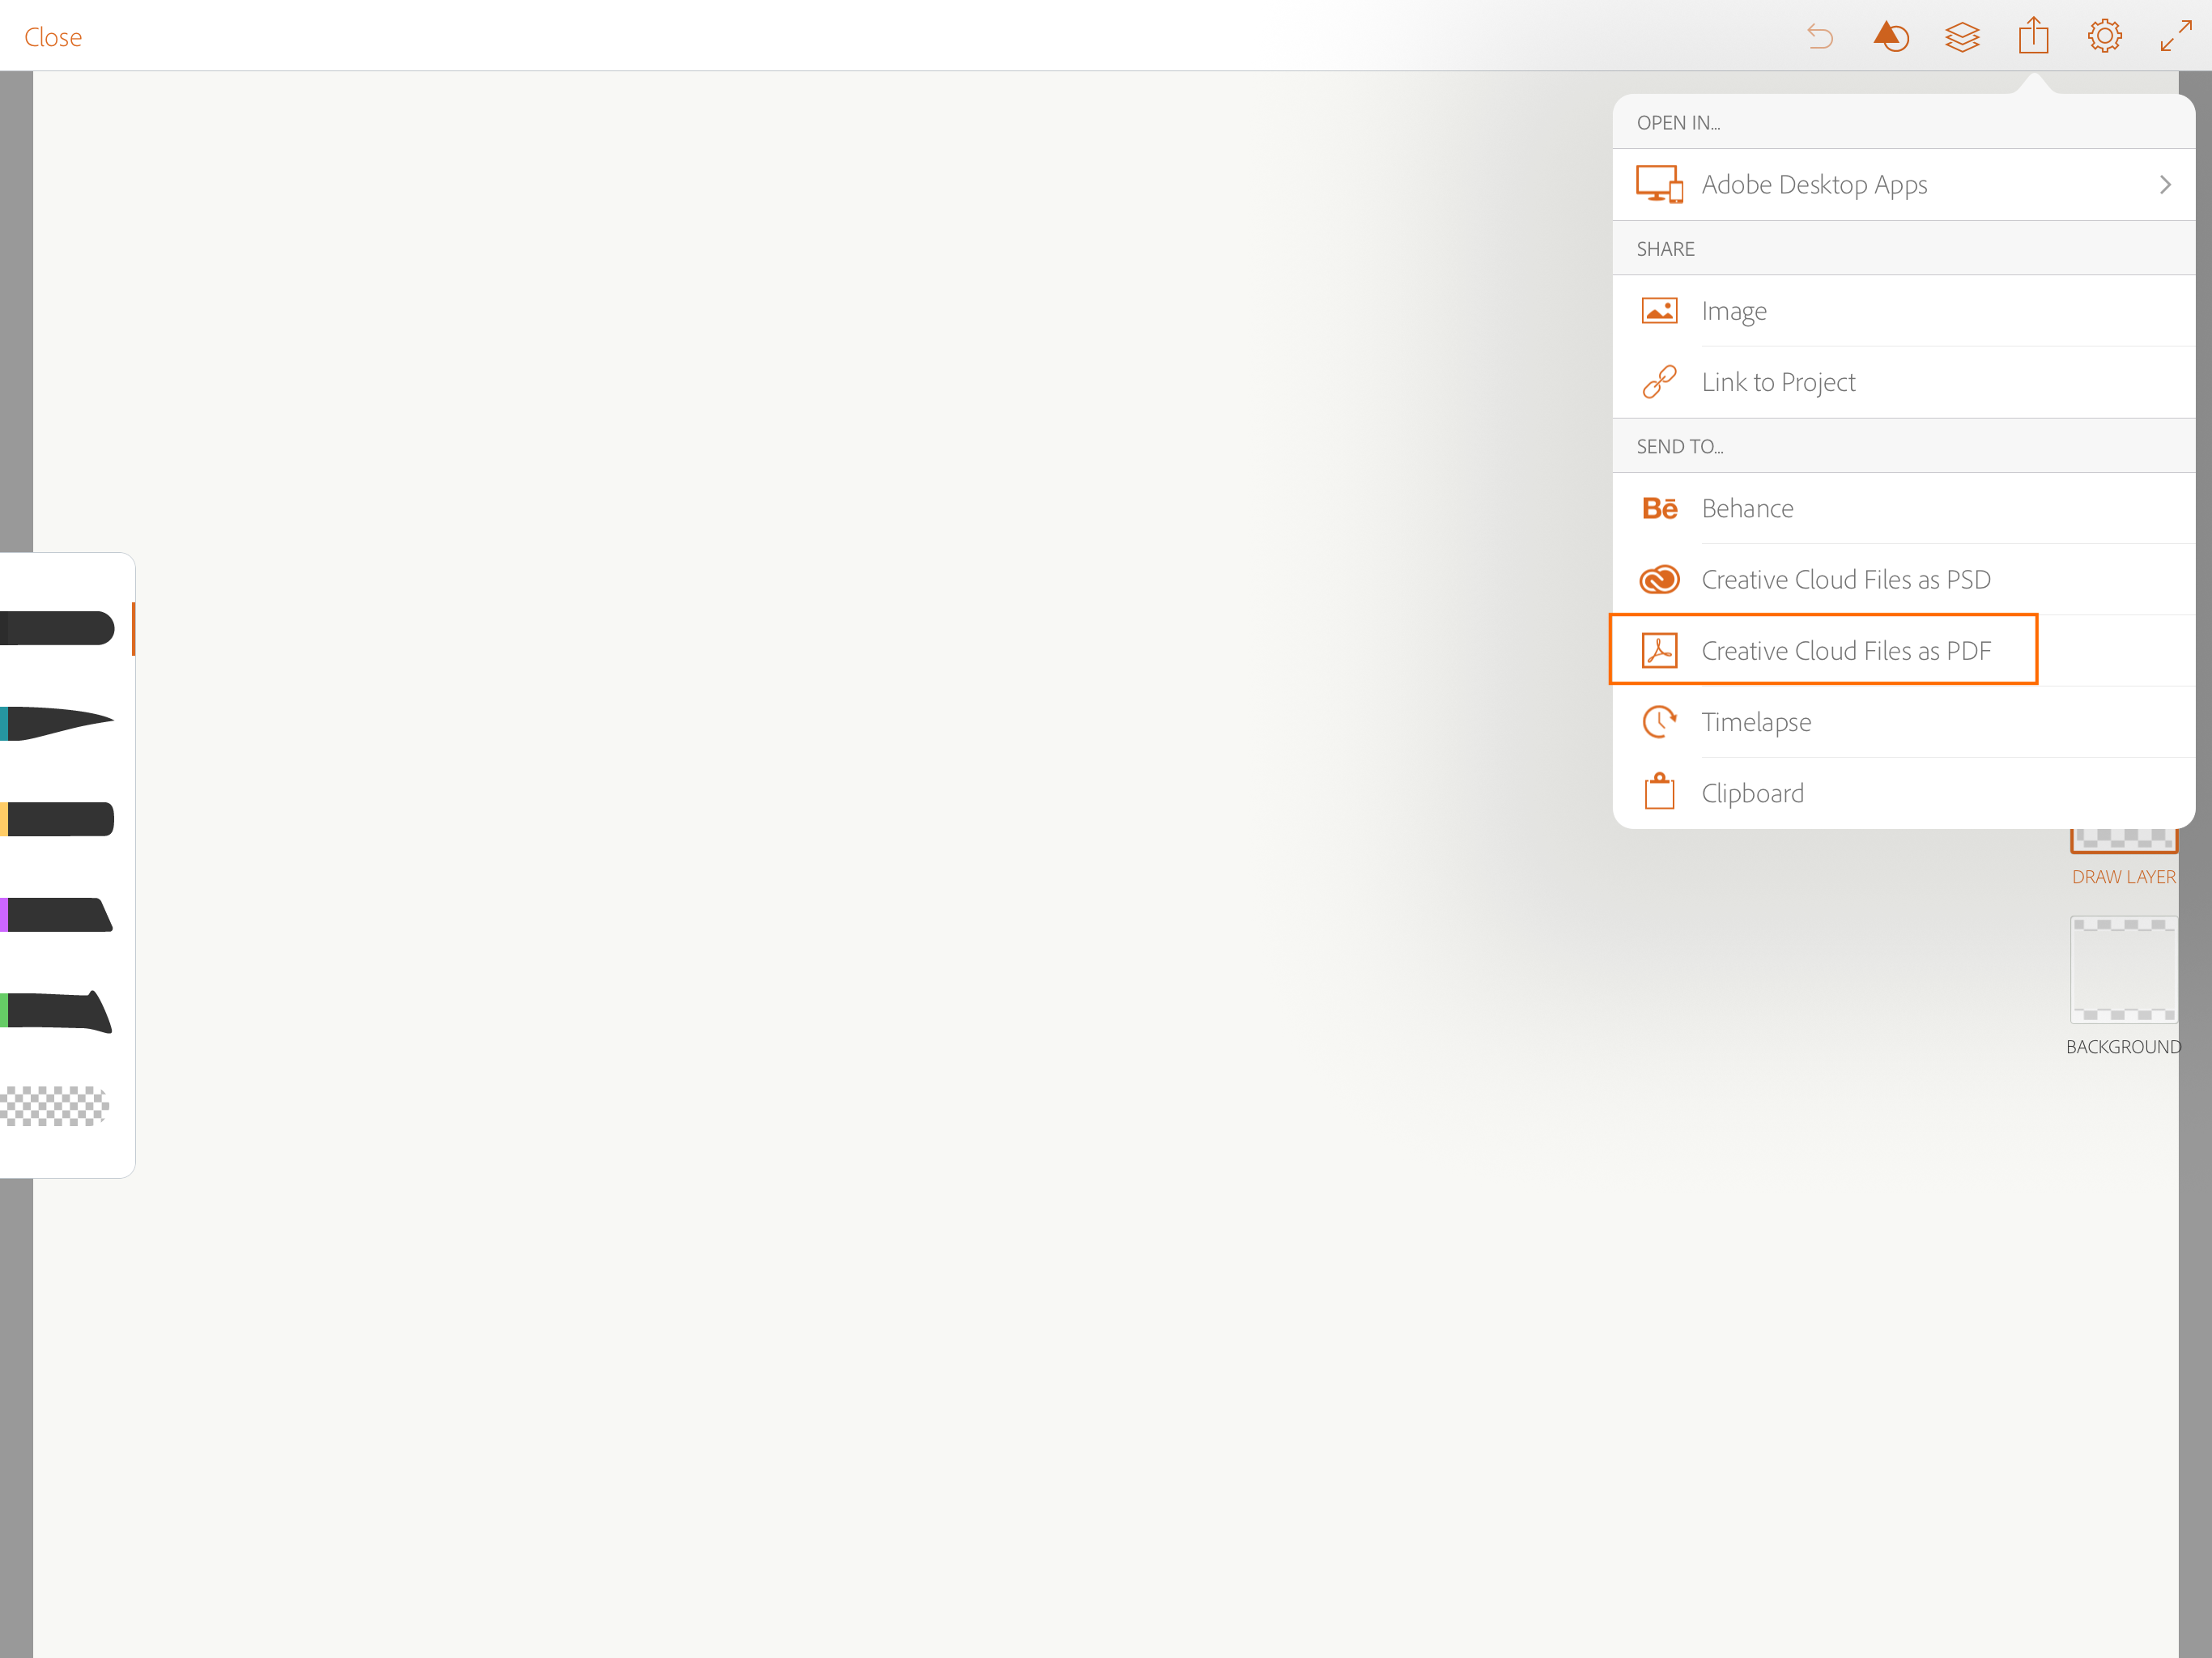
Another favorite feature from Adobe Illustrator Draw is the exporting and sharing setting. Along with your regular exporting options such as sharing via email or publishing it on Behance, you can also publish your artwork as a PDF right onto the Creative Cloud Files folder on your iMac or MacBook. You can then choose to open the artwork in other Adobe programs to refine, touch up, or simply leave it as is.
My last and probably the most favorite feature is the time-lapse generation option. In the past, I have often attempted to record my process, only to quit mid-way through because of technical issues, being uncomfortable about recording my process, or the hassle of having to edit and cut some of the unnecessary footages in-between. Now, with the built-in time-lapse feature, I can focus on creating my artwork knowing the app already does the dirty work of recording the process for me. There is nothing more satisfying than rewatching your process at the end in timelapse. You see it all: how you started, the little hiccups in-between and the rewarding result at the end.

Drawing Process
I will be using one of my successful illustrations to demonstrate my personal process with AID. I created a fictional music poster for an acoustic jam session of the song “Summer Night’s Dream” by my favorite band, FT Island. For this illustration, I used the 12.9 inch iPad Pro as my drawing tablet, and Apple pencil to create the illustration.
First, I started off by roughly sketching the composition and the subject matters, which are the band members. I based the composition of this poster loosely on a screenshot of the actual performance of the song.

Next, I moved on to refining the illustration. I lowered the opacity of the sketch to 30% and simply created a new layer to draw on top of the initial rough drawing. This step took the most time, as I made a few modifications and changes to some of the details in addition to just tracing the sketch.

Along the way, I learned that you can fill a shape with solid colors as long as there are no gaps within it. This is a familiar rule many will already know from working inside Adobe Illustrator. Once my basic coloring was done, I now moved on to adding the final details to the band member’s clothing and their instruments, attempting to write the song name in Hangul, and all other fun stuff to complete my poster.

To summarize, you can view the time-lapse video of the entire process below.
Final Thoughts
If you are a graphic designer and Adobe subscriber like myself and you would like to experiment with digital drawing without the stress of investing in an expensive drawing monitor or other drawing programs, you might like Adobe Illustrator Draw. Overall, the app is simple enough to not overwhelm its first-time user, yet it has all the settings and features that make drawing digitally less intimidating and more enjoyable. I am sharing a few useful links below to hopefully help you get started with this app.
If you already own an iPad or an iPhone, I encourage you to download this app and give it a try. You may be surprised by what you can create after a few hours of trials and errors.
Good luck and have fun drawing!
Resources:
Getting Started with Adobe Illustrator Draw